


How to Choose the Best Thermography Camera
Choosing the right thermography camera might feel overwhelming at first – there are a lot of options out there, ranging from budget-friendly models to high-end systems used in research and aerospace. The key is to focus on what you need it for.
Below, we break down the most important factors to consider so you can make a smart, confident choice.
1. Application – What Will You Use It For?
Start by thinking about your typical inspection tasks:
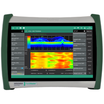
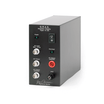
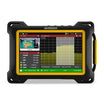
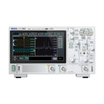
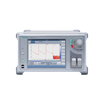
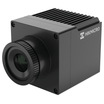
- Electrical maintenance? Look for a camera with high temperature range and good resolution to spot hot spots on cables, breakers, and transformers. For this kind of task, the HIKMICRO G60 is a solid choice, with 640x480 resolution and a wide temperature range up to 650°C.
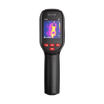
- Mechanical troubleshooting? You’ll need good thermal sensitivity to detect overheating bearings, motors, or shafts. The HIKMICRO M30 offers excellent sensitivity (NETD < 40 mK) and a practical 384x288 resolution.
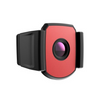
- Building inspection? Prioritize wide-angle lenses, lower temperature ranges, and image fusion features to find heat loss, leaks, or poor insulation. The HIKMICRO Pocket2 is ideal for this, with a compact size, touch screen, and fusion imaging.
- Research and development? You might need high frame rates, radiometric video, or full access to raw data for advanced analysis. For advanced work, a model like the HIKMICRO G60 again stands out for its performance.
Your use case determines the minimum specs you should consider.
2. Thermal Resolution – The Sharpness of Your Image
Just like a digital camera, thermal cameras have resolution too – but it’s measured in pixels that detect heat, not visible light.
- 80×60 – Entry level, basic troubleshooting.
- 160×120 – General purpose inspections.
- 320×240 or 384×288 – Professional, high-detail applications.
- 640×480 or higher – Advanced diagnostics, R&D, or detailed reporting.
For example, the HIKMICRO B20 offers 256x192 resolution, making it a good entry point, while the G60 with 640x480 is better suited for high-detail tasks.
3. Temperature Range – How Hot Is Your Target?
Every thermal camera has a temperature range it can measure.
- Typical range: –20°C to 250°C (good for buildings, HVAC, electronics).
- Mid-range: up to 650°C (suitable for industrial maintenance, motors, power electronics).
- High-end: 1000°C+ (for metallurgy, furnaces, foundries).
Many models like the HIKMICRO M30 and G60 go up to 650°C, which is ideal for most industrial applications.
4. Thermal Sensitivity (NETD) – Can It Detect Subtle Differences?
NETD (Noise Equivalent Temperature Difference) tells you how small a temperature difference the camera can detect.
- < 0.05°C (50 mK) is excellent
- 0.07–0.1°C is acceptable for general use
- Higher values may miss subtle faults
The M30 offers NETD < 40 mK, which is very sensitive and suitable for detecting fine temperature differences.
5. Emissivity and Surface Type
Different materials emit heat differently. A good thermal camera lets you adjust the emissivity setting to match the surface you're measuring — metal, plastic, wood, etc.
All the models on our site, including the B20, Pocket2, and M30, support emissivity adjustments.
6. Image Modes – More Than Just Thermal
Many cameras support image fusion, which overlays the thermal image on top of a visual (RGB) image. This helps you quickly locate and understand what you’re looking at.
Some also support:
- Picture-in-picture
- Side-by-side comparisons
- Thermal video recording
- Automatic hot/cold spot markers
The Pocket2 and M30 include these features, improving usability and inspection accuracy.
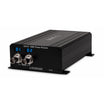
7. Connectivity and Software
Modern thermal cameras often come with:
- Wi-Fi or Bluetooth for file transfers
- USB-C or SD card slots
- Cloud storage or mobile apps
The HIKMICRO Pocket2 excels in this area, with fast Wi-Fi transfer and companion apps for quick sharing and reporting.
8. Ergonomics and Battery Life
If you're using the camera all day:
- Make sure it’s lightweight and comfortable to hold.
- Look for rotating lenses or screens if you need to shoot from odd angles.
- Check the battery runtime and whether extra batteries are available.
Compact models like the Pocket2 are great for everyday use, while the G60 offers a rugged design with larger screen and long battery life.
9. Budget vs. Value
Entry-level models start around €300–€1,000 and are great for casual or occasional use. Professional cameras range from €2,000 to €10,000+, but offer better performance, precision, and long-term reliability.
Ask yourself:
- Will it save time or prevent failures?
- Can I use it across departments or applications?
- Is it a long-term investment?
Our selection includes affordable options like the B20, balanced mid-range like the M30, and high-end like the G60. Each gives you value based on your application and frequency of use.
Final Tip: Try Before You Buy
If possible, test a few models. Some suppliers offer demo units or on-site testing. That’s the best way to find out what feels right and performs well in your actual environment.
Need help choosing? Contact us for advice or a product demo.
Or follow the link below for our demo collection
Key Takeaways
- Start by identifying your primary use case (electrical, mechanical, building, or R&D)
- Higher resolution and sensitivity = better detail and fault detection
- Temperature range should match the environment you inspect
- Adjustable emissivity ensures accurate readings on all materials
- Features like image fusion and Wi-Fi boost efficiency and clarity
- Consider ergonomics and battery life for frequent use
- Match your budget with the level of detail and reliability you need
- Always test a few models if you can, to find the best fit for your work